Operating the DAQ system
At this point, we’re nearly ready to take data. This page will describe how to choose a configuration file and start and stop runs. This is probably the most relevant part of the manual from the point of view of the person taking an experimental shift.
Web GUI status page
After logging into the system at http://localhost:8080 or whatever address the system is available at, you will arrive at the main status page:
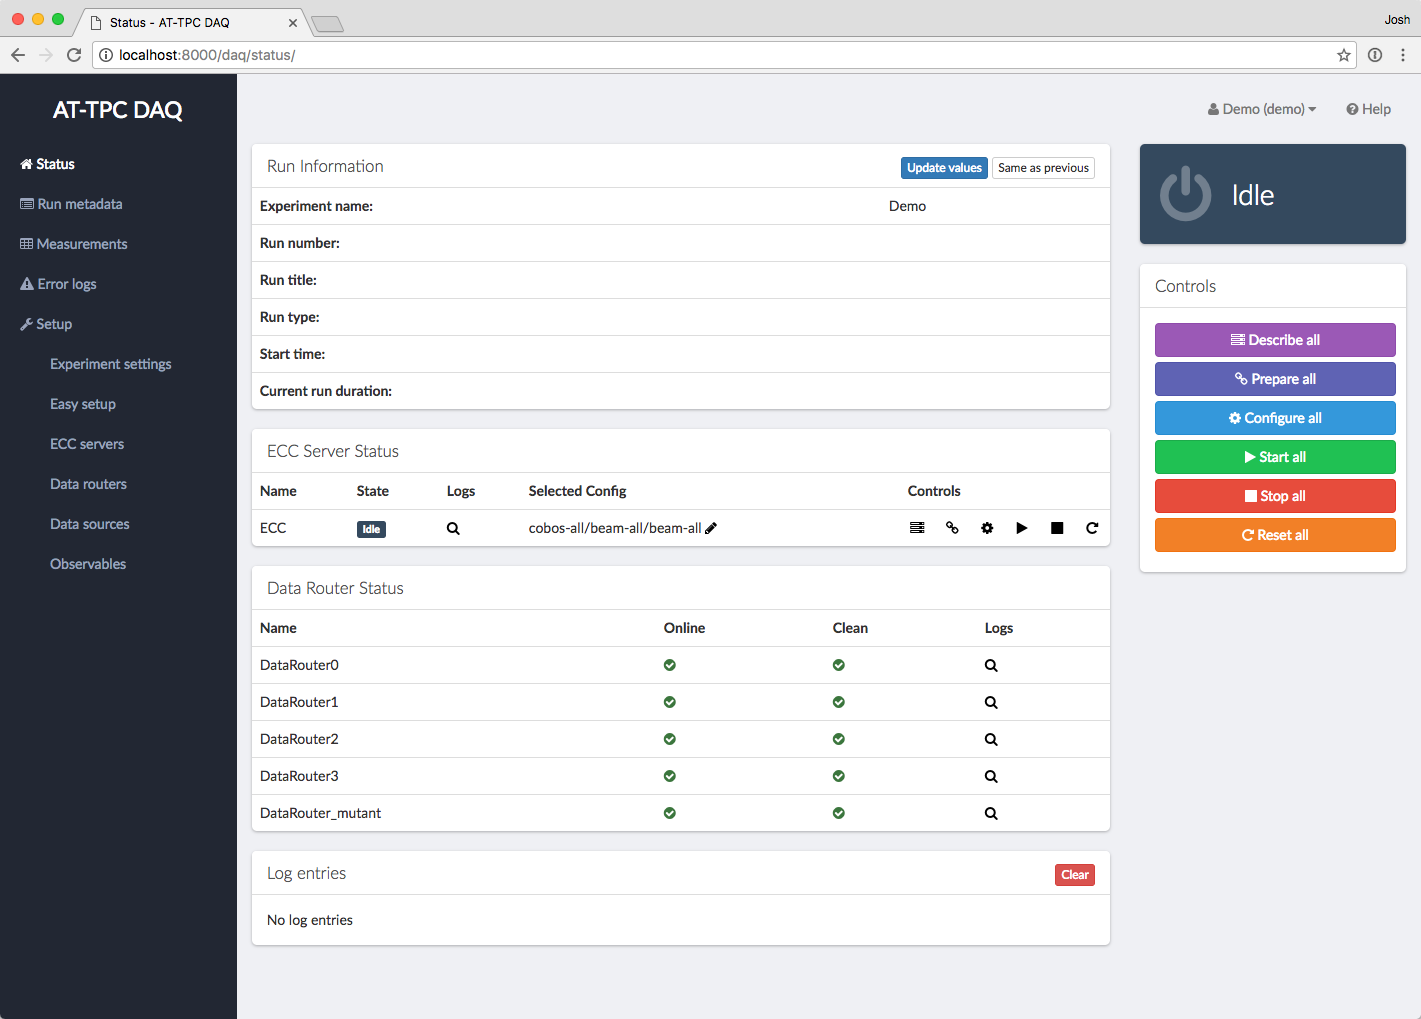
This page shows an overview of what’s currently happening in the system. It is divided into a set of panels:
- Run Information
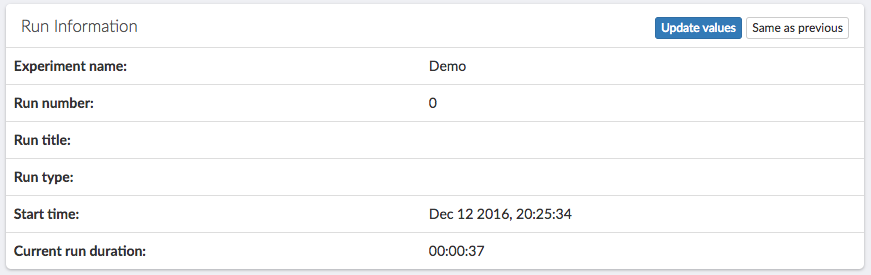
- This panel has details about the current current run, like how long it has been going and what run number is currently being recorded.
- ECC Server Status
- This panel lists the status of each ECC server the system knows about. The “State” indicator shows what state machine state the ECC server is in (i.e. “Idle”, “Ready”, “Running”, etc.). The “Selected Config” column lists the name of the config file set that will be used to configure the devices. he “Controls” column contains a set of buttons for changing the state of an individual ECC server. These button should only be used for troubleshooting purposes. Finally, clicking the icon in the “Logs” column will display the last few lines of the log file for that ECC server.
- Data Router Status
- This panel shows the state of all of the data routers the system knows about. The “Online” column shows if the data router process is running, and the “Clean” column shows if the data router’s staging directory contains unsorted files. Both of these should display green checkmarks if the system is ready to take data.
- Log Entries
- This panel will show the latest error messages from the web interface. This does not include error messages that may be produced by the GET software. You can click on an individual error to get more information and possibly a traceback. Finally, clicking “Clear” will discard all error messages.
- Controls
- This set of large buttons configures the entire system at once. This is what you should use to control the system. The reset button will step the system back one state. For example, if the system is in the “Ready” state, pressing Reset will step it back to “Prepared”.
Selecting a configuration
Once all necessary processes are up and running, the ECC Server Status panel should display a status of “Idle” for each ECC server and the Data Router Status panel should show green check marks next to each data router. At this point, you should select a config file for each ECC server.
Config files can be selected by clicking the pencil icon next to the current config name in the Selected Config column of the ECC Server Status panel.

This will bring up a page with a drop-down menu listing the configurations available for that ECC server. The
list of available configurations contains all possible permutations of the set of describe-*.xcfg,
prepare-*.xcfg, and configure-*.xcfg files known to the ECC server. Each configuration is identified by
a name composed of the names of the three *.xcfg files that go into it, formatted as
[describe-name]/[prepare-name]/[configure-name]. For example, if you want to configure a data source using the files
describe-cobo0.xcfg, prepare-experiment.xcfg, and configure-experiment.xcfg, then you should choose the
configuration called cobo0/experiment/experiment. See Config files for more information about these files
and their naming convention.
Preparing to take runs
After selecting a configuration, the CoBos and MuTAnT must be configured to prepare them to take data. This can be done using the first three buttons on the main Controls panel.
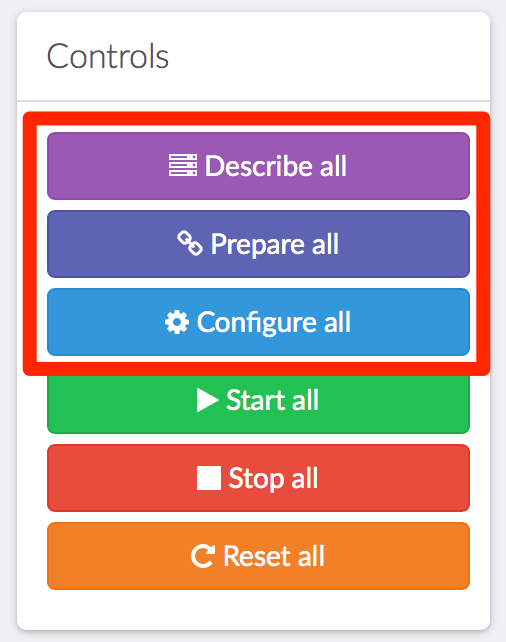
Begin by clicking the “Describe all” button. The system will then send a message to the ECC servers telling them to execute the “Describe” transition on the CoBos. The status label for each ECC server should then disappear and be replaced by a spinning cursor. Once the transition is finished, each ECC server should list a status of “Described”, and the overall system status in the top-right corner should also be shown as “Described.”
Note
These system-wide buttons only work if all ECC servers are in the same state. If they are in different states, you will need to use the individual controls in the ECC Server Status panel to bring them into the same state.
The next two steps are nearly identical. Click the “Prepare all” button, and wait until the status on each ECC server is shown as “Prepared.” Finally, click “Configure all,” and wait for a status of “Ready.” At this point, the system is ready to take data.
Note
If one or more of the CoBos fails to complete the state transition, their ECC servers will remain in whatever state they started in. This will be apparent since that ECC server will have a different label from the others, and the overall system status in the top-right corner will be shown as “Error.” If this happens, look for an error message in the “Log entries” panel at the bottom of the page, and try to diagnose the problem. Once the problem is fixed, try using the individual controls in the ECC Server Status panel to bring the troublesome server to the same state as the others.
Starting a run
Runs are controlled using the “Start all” and “Stop all” buttons in the main Controls panel.
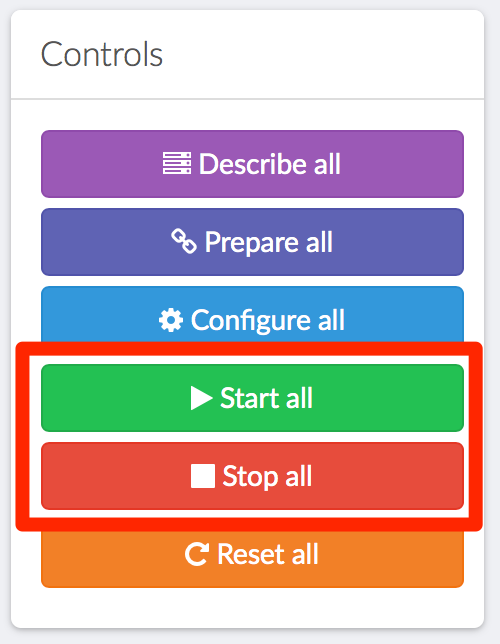
Once you click “Start all,” the CoBos will begin recording data and the Run Information panel should update to reflect the new run.
Danger
Data taking on the CoBos can also be started and stopped using the individual source control buttons on the ECC Server Status panel; however, if this is done, the global run number will not be updated. Therefore, these individual buttons should only be used in the case of an error where a CoBo fails to start recording data.
Recording run metadata
Once a new run has been started, metadata about the run can be entered by clicking on either the “Update values” or “Same as previous” button on the Run Information panel. Both of these will bring up a form where you can enter information about the current run. The only difference between the two is that the “Same as previous” button will pre-fill some fields with their values from the previous run. This is useful for values that don’t change often.
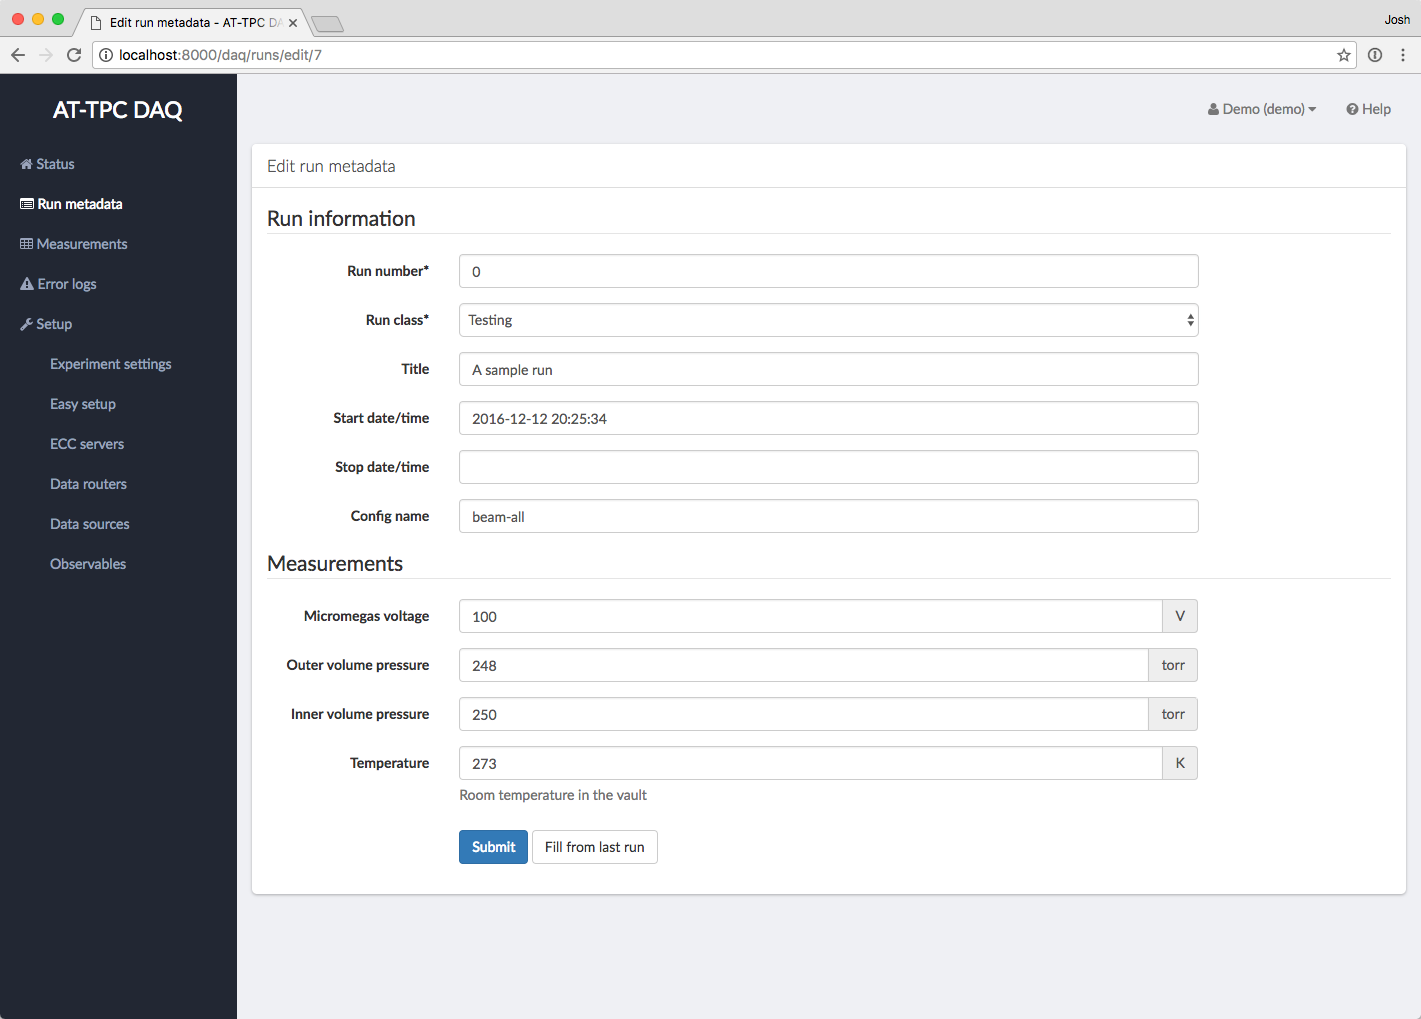
Fill in any values on this page that were not filled automatically, and then click “Submit” to save them. You can get back to the status page by clicking “Status” in the left-hand menu.
Tip
The run will continue even if you navigate away from the status page or close the web browser.
Stopping a run
When it is time to stop a run, click the “Stop all” button. This will tell the CoBos to stop recording data, and it will also tell the system to connect to each computer where the data router is running and rearrange the data files into a directory for the just-completed run. Watch the “Clean” column in the Data Router Status panel to see when this process has finished.
Warning
It may take several seconds for the data files to be rearranged on each computer. You must wait until this process is complete before the system will allow you to start a new run.
Resetting the system
When an experiment is complete, or when you want to re-configure the CoBos, the system should be reset to the “Idle” state. This can be done using the “Reset all” button in the main Controls panel. One click of this button will step each ECC server back by one state in the state machine (see CoBo state machine).
Note
Each transition must finish before you click the Reset button again.